Miami Wedding Recap!
19 March 2026
12:22 PM
So I promised that I would share pictures from my sister in law Michael's wedding that was held on South Beach a few weeks ago. Michael is my husband Kris' younger sister and has always been like a true sister to me. She married Charlie, and they are just perfect together! I was a bridesmaid and it was a total honor to be a part of their special weekend!
My mother in law, Terri, is truly one of the best party planners I have ever known and along with Michael and their fabulous wedding planner and good friend, Lauren, they created a truly magical night! Their photographer, Jenny from Captured Photography, captured the evening with some of the most beautiful pictures! She just posted them to her blog here. You can check out all of the amazing things that happened at Michael and Charlie's wedding including the cake pop cake, krispy kreme doughnuts, flip books and other surprises!
These next three pictures were taken by my friend and not by the photographer LOL.
How cute are my mom and dad?!
I was soo happy they came to the wedding!
I was soo happy they came to the wedding!

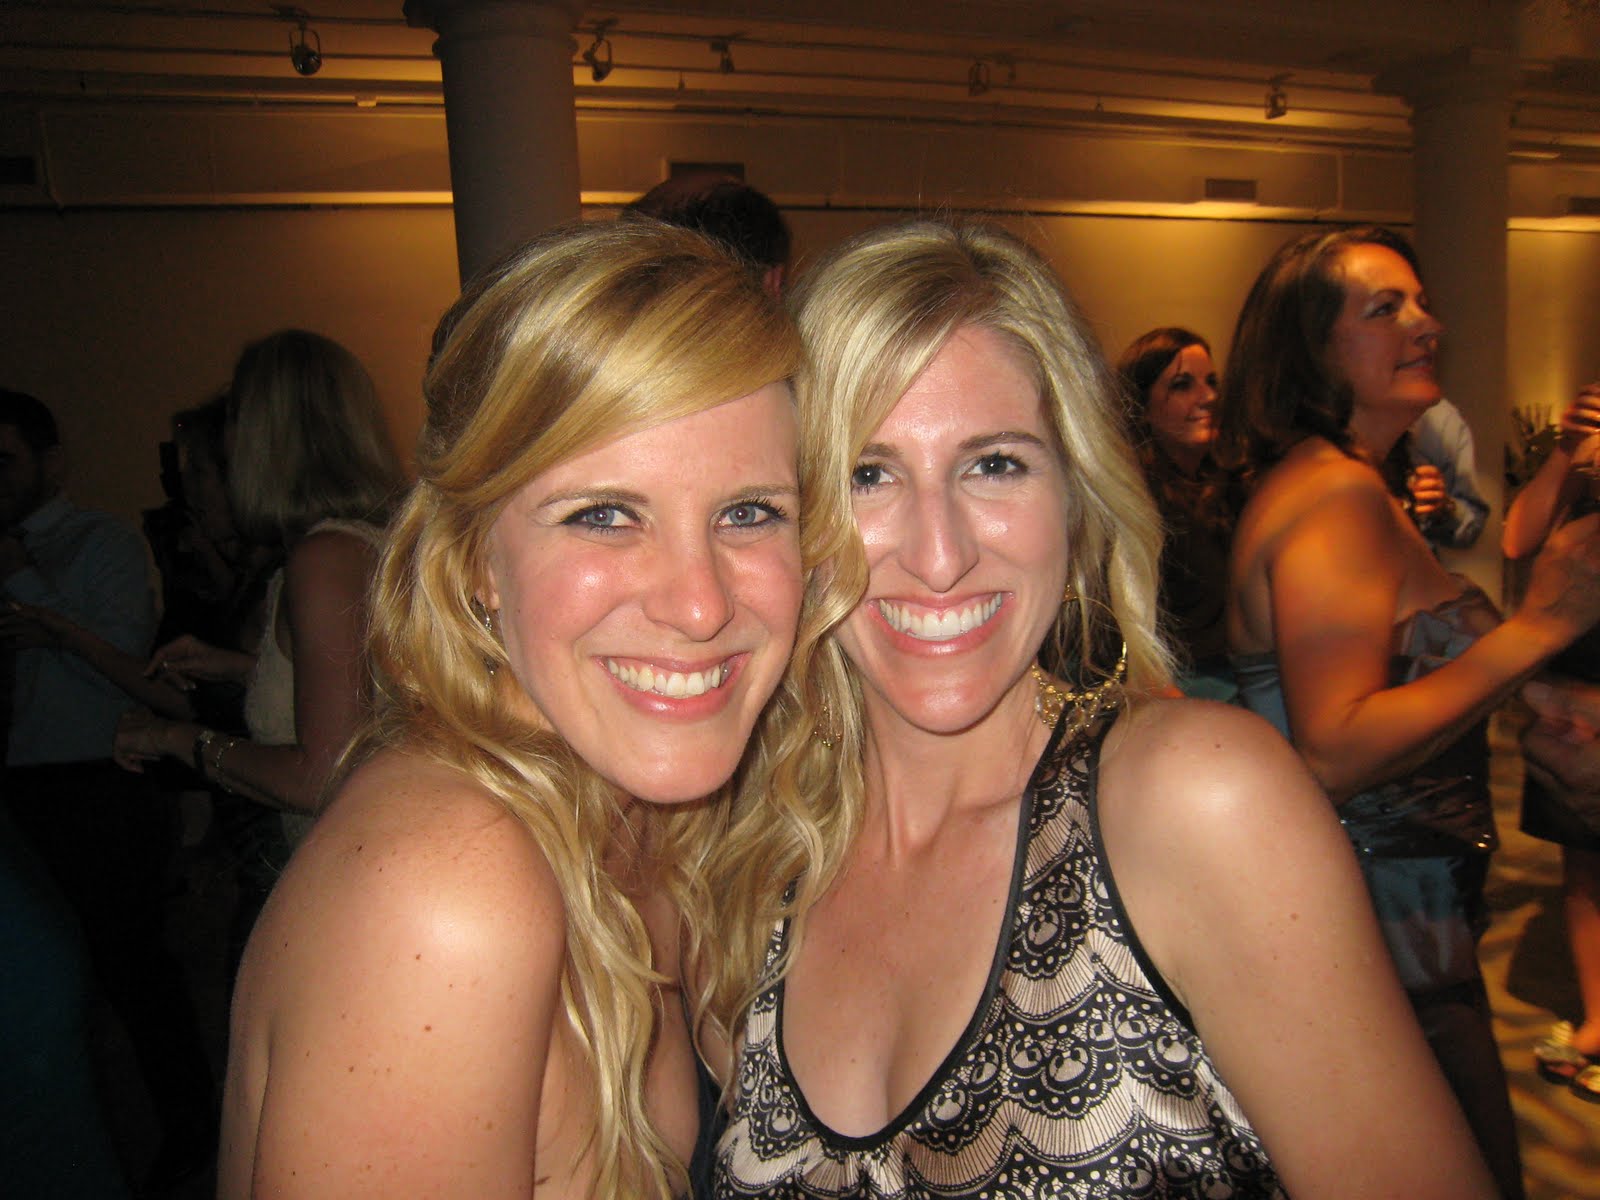
My beautiful best friend Kristin and I (I am on the left)!
My handsome husband Kris and I!

We had the best time at Michael and Charlie's wedding and I am so happy for them! I hope you enjoyed seeing the pictures from their wedding day! Have a fabulous weekend!
xoxo
Meggan
xoxo
Meggan
What I'm Loving Wednesdays...70's Inspired Floppy Hats!
16 March 2026
7:54 PM
It seems like these gorgeous 70's inspired floppy hats are everywhere, and I am completely on board with this trend. Faye Dunaway is one of the inspirations behind the floppy hat...isn't this picture gorgeous!

When I was watching Glee last night (yes, I am a total gleek!), I saw Brittany with an adorable orange colored floppy hat.

I love it how these hats are part bohemian and part romantic...plus they are super useful for blocking out the sun. When you are as pale as I am and live in South Florida, you have to think about these things all the time :)
When I was watching Glee last night (yes, I am a total gleek!), I saw Brittany with an adorable orange colored floppy hat.
I love it how these hats are part bohemian and part romantic...plus they are super useful for blocking out the sun. When you are as pale as I am and live in South Florida, you have to think about these things all the time :)
This weekend I am definitely going to try and see if I can find one of these fabulous hats! I may even add some fun Lila Grace flowers to my hat ala the Marc Jacobs Spring 2011 Runway show.

I am linking up to this kind of love's party this week!
xoxo
Meggan

I am linking up to this kind of love's party this week!
xoxo
Meggan
Wisteria Inspired Shell Wreath
15 March 2026
7:46 PM
Hi everyone!
I hope you had a great weekend and start to your week! I have been super MIA recently because we have had some exciting news in our family! My husband's sister Michael Marie was married last weekend on South Beach. The whole weekend was so perfect and I was so blessed to be a part of it. Lila Grace did several pieces for the wedding including the ring bearer pillow, flower girl sash and hair clips and flowers for the welcome boxes. As soon as I get the pictures from their photographer I will do a post on the incredible weekend!
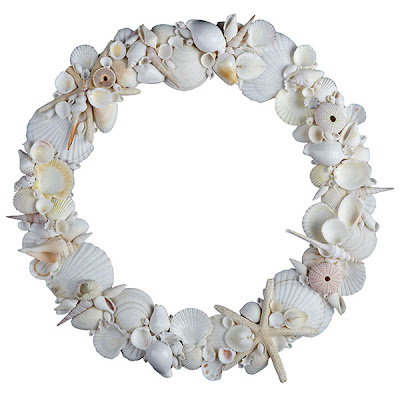
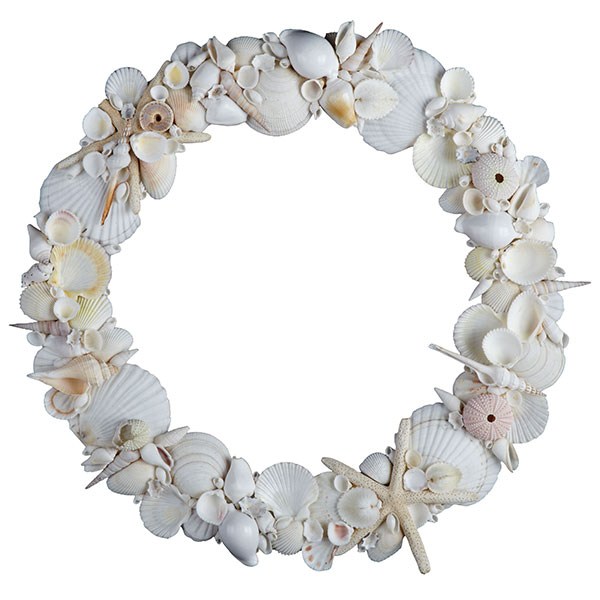
The other day I found the most amazing shell wreath here on Wisteria's website. I literally just discovered Wisteria and I feel like I have come out of the the dark ages. Seriously, where have I been, this site is amazing!
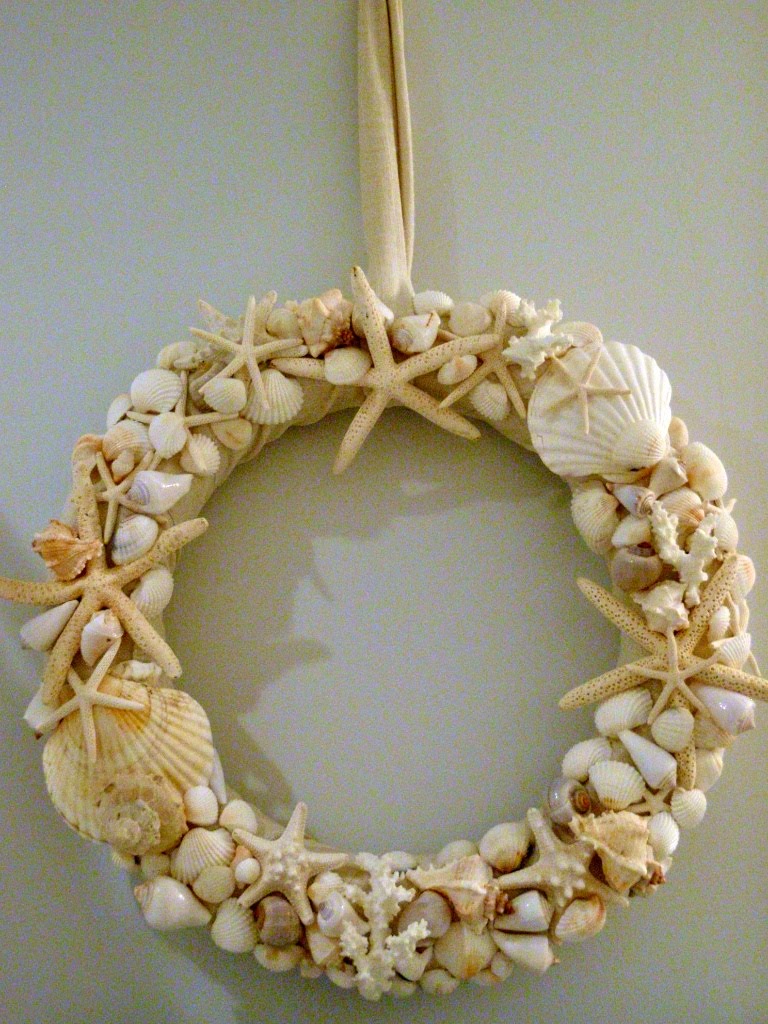
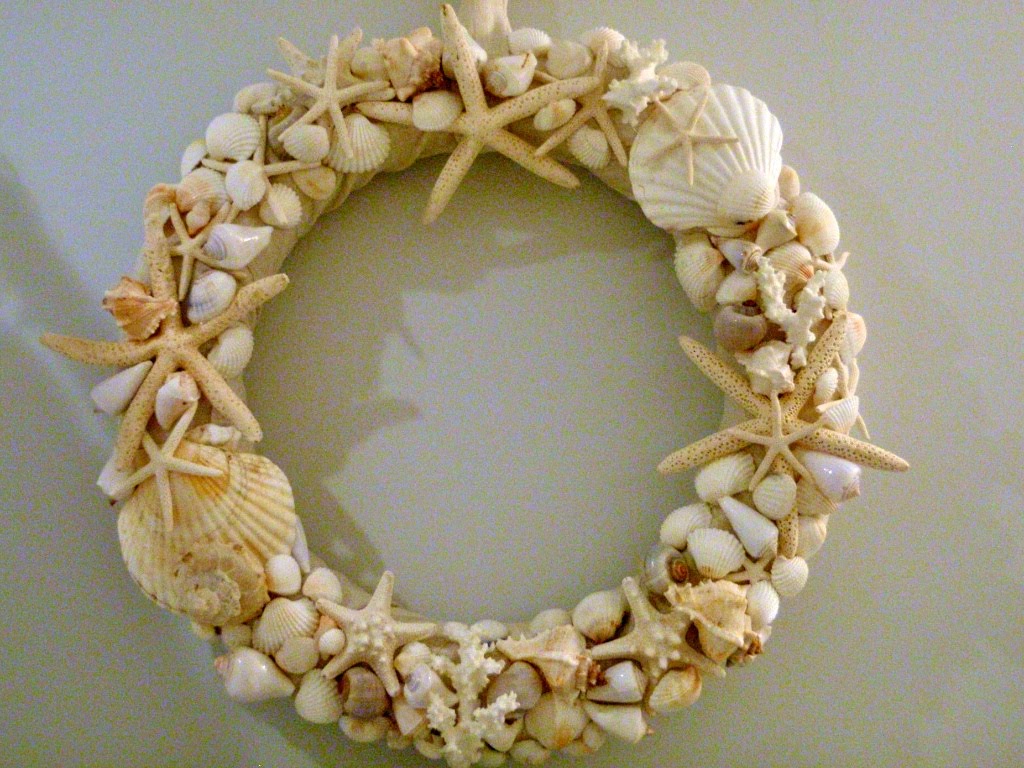
I fell in love with everything on their site...except the price the shell wreath I was dying over. As I was pouring over the site, the stars aligned and I remembered that I had a ton of shells and star fish left over from my destination wedding {you can check out the post on my wedding here}! I went through several iterations of trying to re-create this wreath and I learned it is really hard to spray paint styrofoam. Finally I made it work! Here is how I made my version of Wisteria's Shell Wreath.
 Supplies:
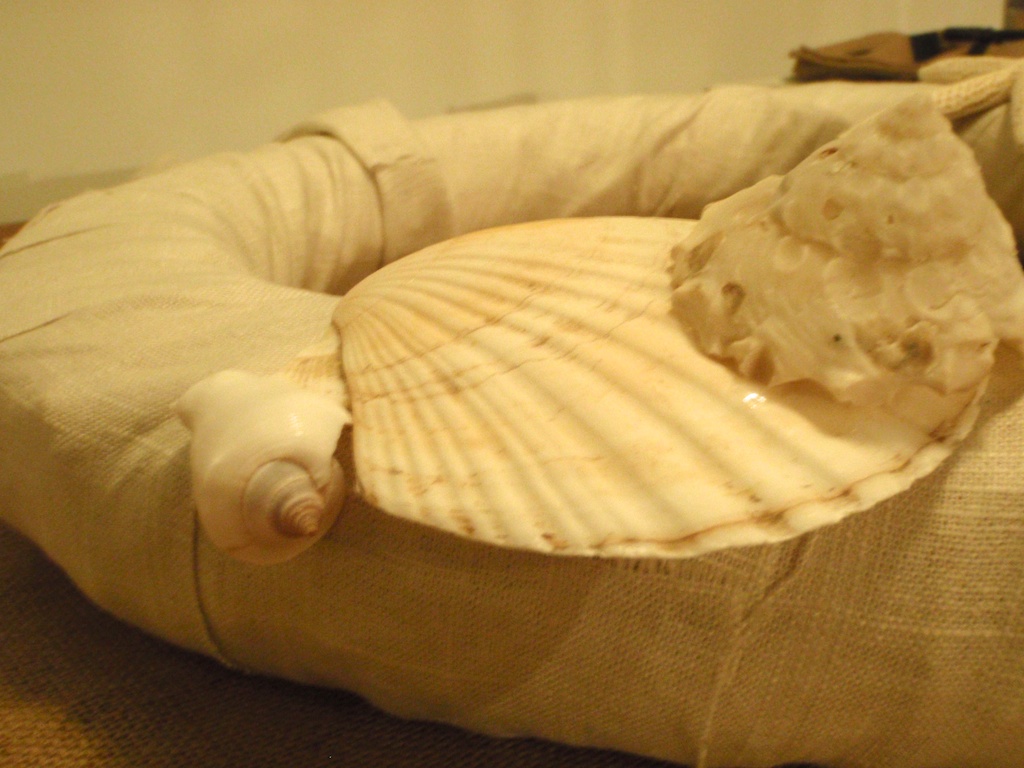
Start off by wrapping your linen fabric around your wreath to cover the straw. Determine where the top center of your wreath will be. Add a loop of fabric to hang your wreath. I used same linen material that I used to wrap the wreath, but you could use white grosgrain ribbon or another classic ribbon. I'm sorry that I didn't take pictures of this stage!
Step 2
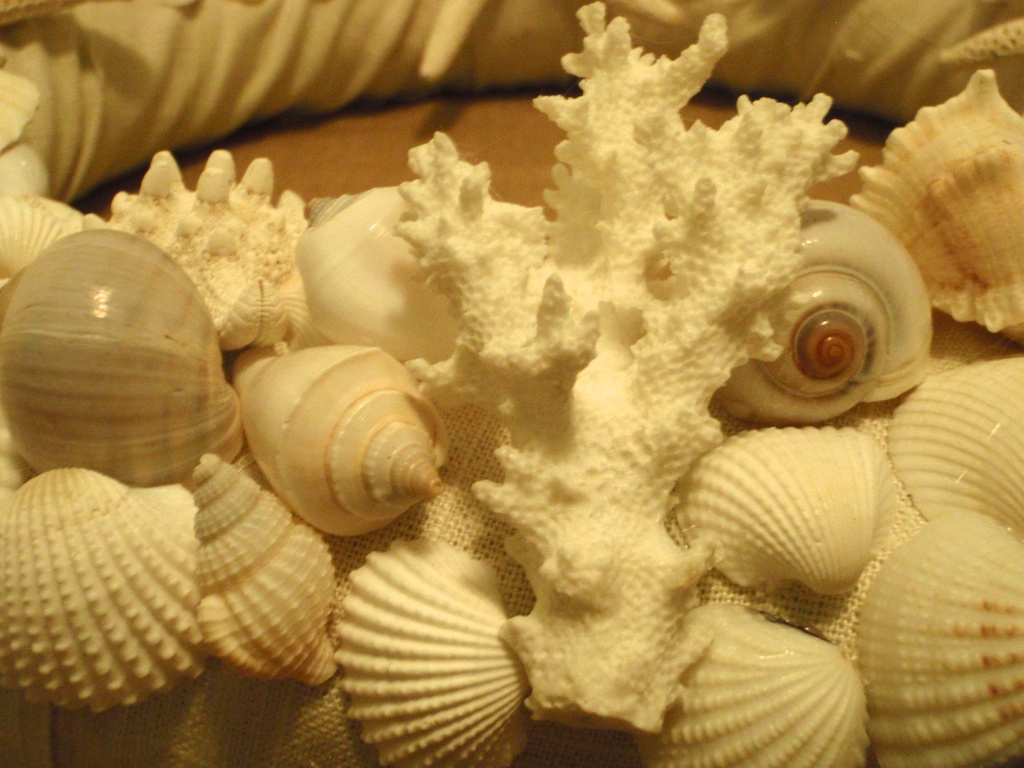
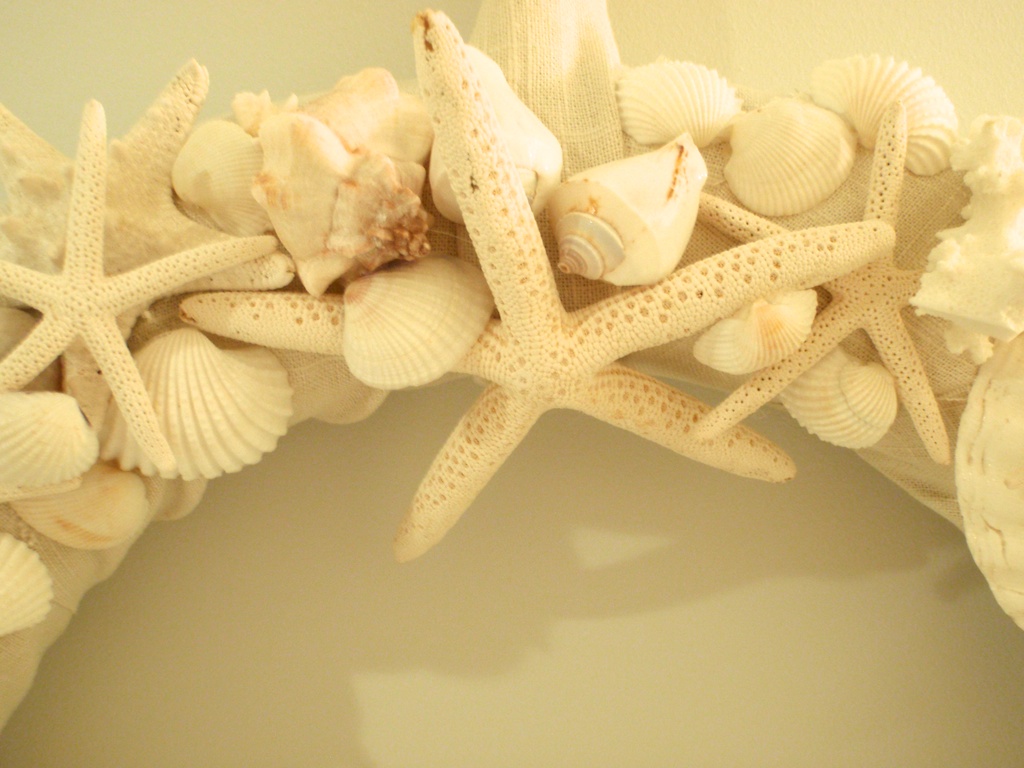
Start to hot glue your shells and star fish to the linen on the wreath. I started by gluing a few of the larger shells as "anchors" and then added more shells from there. Not every area of the wreath needs to be covered in shells, but you want it to look full.


Step 3
Once all of your shells are glued to your wreath, do a spot check to ensure everything is glued on securely. Then simply find a fabulous spot for your wreath!
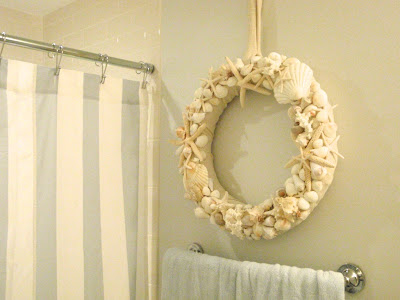
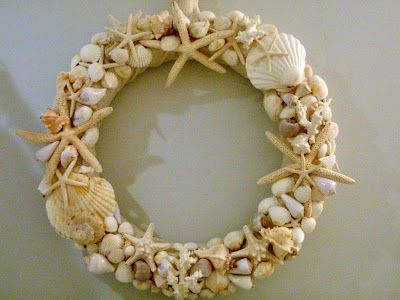
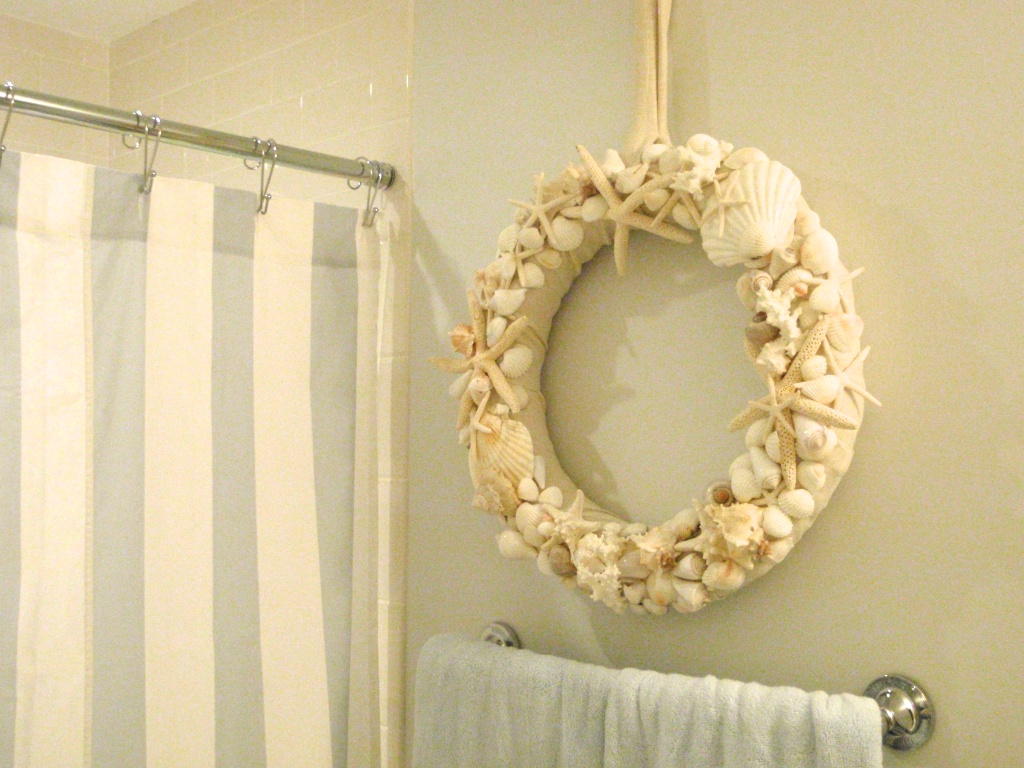
I decided to add my shell wreath to our 2nd bathroom because this bathroom has a beach cottage vibe. This bathroom was TOTALLY overhauled a few months ago {you can read about it here} but there is still some work to do. I can't wait to share the makeover as we go. Here is my finished wreath in it's place!


Have a fabulous night!
xoxo
Meggan
I will be sharing this project at these parties this week:
Tuesday's Treasures at My Uncommon Slice of Suburbia
Wow Us Wednesday at Savvy Southern Style
The DIY Project Parade at The DIY Show Off French Country Cottage: Feathered Nest Friday
Tatertots and Jello Weekend Wrap Up Party
I hope you had a great weekend and start to your week! I have been super MIA recently because we have had some exciting news in our family! My husband's sister Michael Marie was married last weekend on South Beach. The whole weekend was so perfect and I was so blessed to be a part of it. Lila Grace did several pieces for the wedding including the ring bearer pillow, flower girl sash and hair clips and flowers for the welcome boxes. As soon as I get the pictures from their photographer I will do a post on the incredible weekend!
The other day I found the most amazing shell wreath here on Wisteria's website. I literally just discovered Wisteria and I feel like I have come out of the the dark ages. Seriously, where have I been, this site is amazing!
I fell in love with everything on their site...except the price the shell wreath I was dying over. As I was pouring over the site, the stars aligned and I remembered that I had a ton of shells and star fish left over from my destination wedding {you can check out the post on my wedding here}! I went through several iterations of trying to re-create this wreath and I learned it is really hard to spray paint styrofoam. Finally I made it work! Here is how I made my version of Wisteria's Shell Wreath.
 Supplies:
- Large straw wreath from Michaels with plastic cover on
- Strips of linen fabric - about 3 yards in length and 5-7 inches thick
- Assorted shells and star fish - I found mine on sale at Pottery Barn for a steal at the end of the season
- Hot Glue
Start off by wrapping your linen fabric around your wreath to cover the straw. Determine where the top center of your wreath will be. Add a loop of fabric to hang your wreath. I used same linen material that I used to wrap the wreath, but you could use white grosgrain ribbon or another classic ribbon. I'm sorry that I didn't take pictures of this stage!
Step 2
Start to hot glue your shells and star fish to the linen on the wreath. I started by gluing a few of the larger shells as "anchors" and then added more shells from there. Not every area of the wreath needs to be covered in shells, but you want it to look full.
Step 3
Once all of your shells are glued to your wreath, do a spot check to ensure everything is glued on securely. Then simply find a fabulous spot for your wreath!
I decided to add my shell wreath to our 2nd bathroom because this bathroom has a beach cottage vibe. This bathroom was TOTALLY overhauled a few months ago {you can read about it here} but there is still some work to do. I can't wait to share the makeover as we go. Here is my finished wreath in it's place!
Have a fabulous night!
xoxo
Meggan
I will be sharing this project at these parties this week:
Tuesday's Treasures at My Uncommon Slice of Suburbia
Wow Us Wednesday at Savvy Southern Style
The DIY Project Parade at The DIY Show Off French Country Cottage: Feathered Nest Friday
Tatertots and Jello Weekend Wrap Up Party