Bridesmaids Spa Day
29 February 2026
4:52 AM
This past weekend was quite a whirlwind! My brother in law got married and from Thursday through Sunday, we had a bevy of wedding related events. The weekend was kicked off with a beautiful bridesmaids luncheon and spa day hosted by my mother in law. We were treated to massages, manicures and pedicures along with an amazing lunch! Below are the pictures from this incredible day.
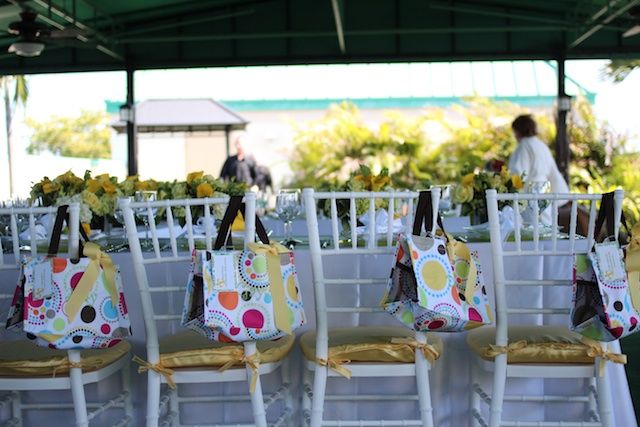 |
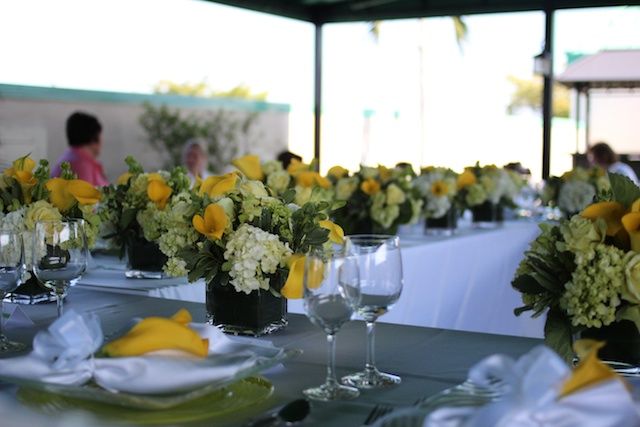
| Gorgeous set up for lunch! |
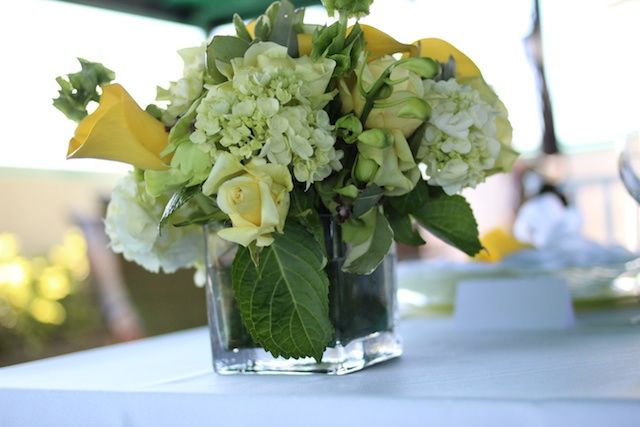 |
| Beautiful centerpieces lined the table |
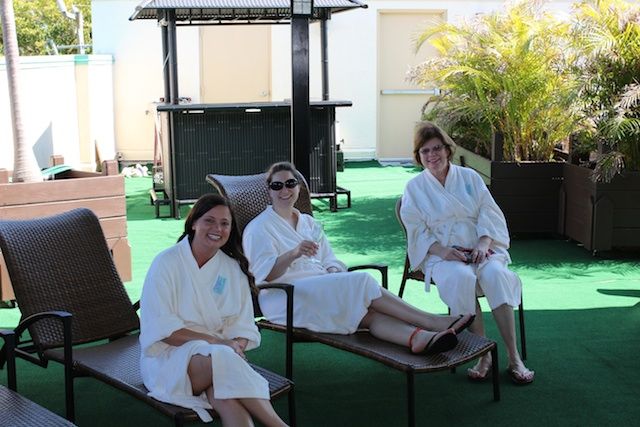 |
| Ladies relaxing after massages and mani/pedis |
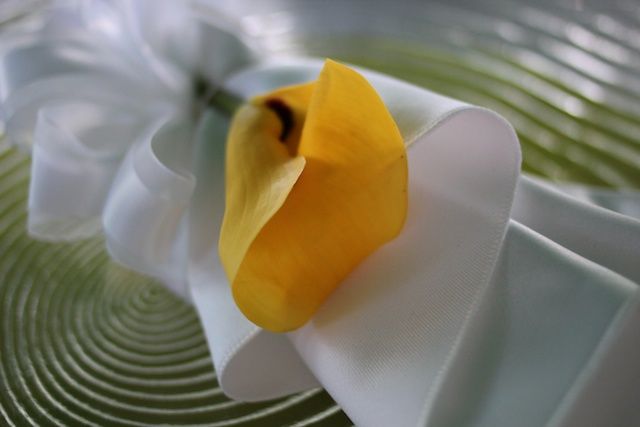 |
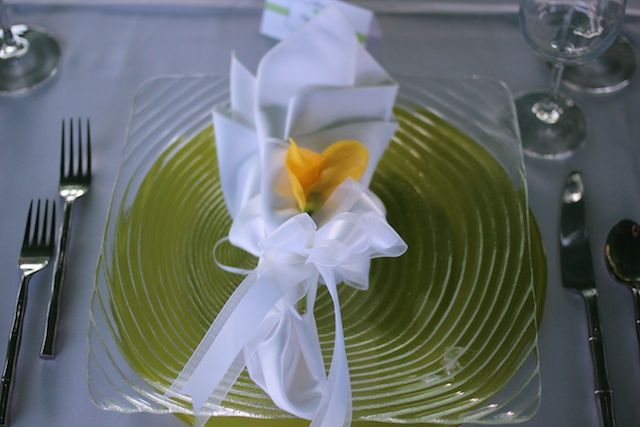
| Cala Lilies were at each place |
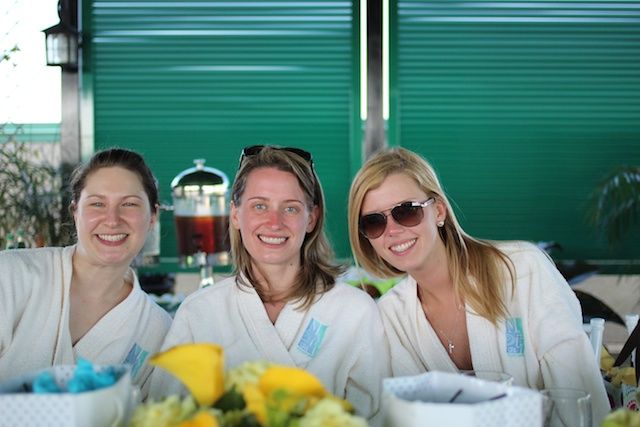 |
| Mel and her sister and sister in law |
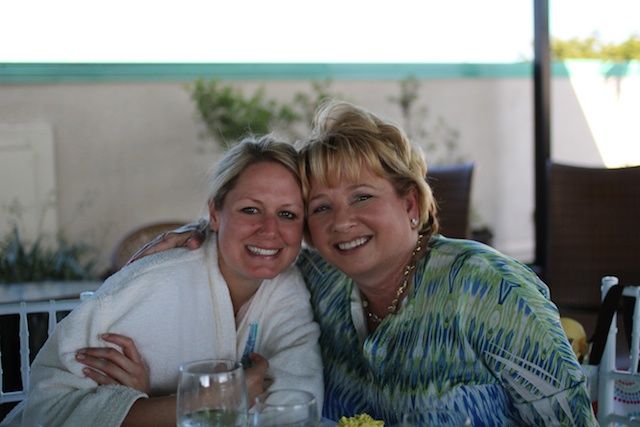 |
| Terri, our hostess, and her daughter Michael |
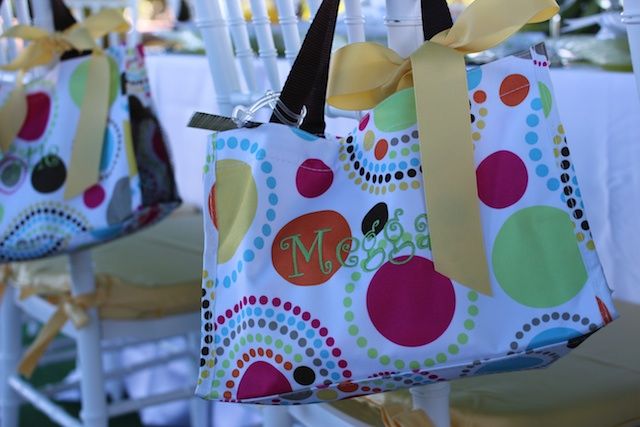 |
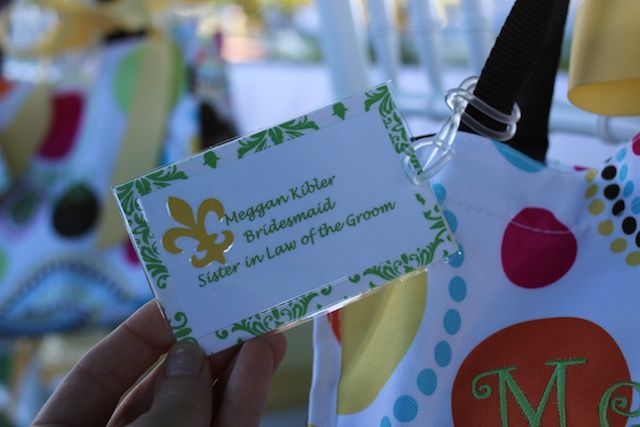
| Each guest received a cute embroidered tote filled with a personalized robe, Ahava products, Essie nail polishes and note cards. It was precious! |
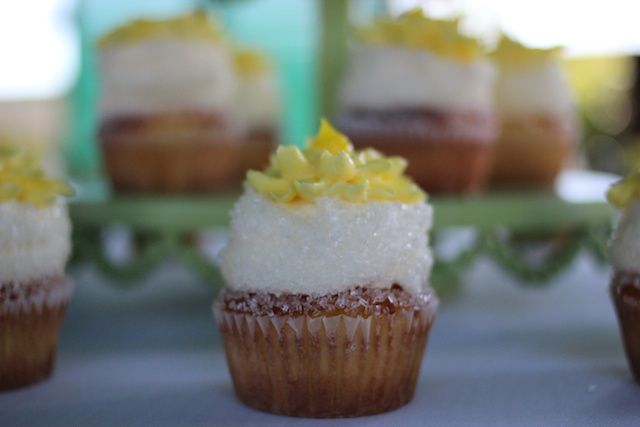 |
| Amazing cupcakes were for dessert! |
Styling Bookshelves
22 February 2026
6:49 AM
I have long struggled with knowing how to style bookshelves. The open space is just so intimidating! I have been scouring the internet and Pinterest for inspiration, and have found some fabulously styled bookshelves!
After the wedding this weekend I am planning on using some of this inspiration to finally style two struggling bookshelves in my house! I am linking up with The Vintage Apple for Pinteresting Wednesday!
xoxo Meggan
xoxo Meggan
Eating Light - Southwestern Stuffed Peppers
20 February 2026
3:55 AM
Hi sweet friends! I am so sorry for my terribly long absence. It's so frustrating when "real life" gets in the way of blogging!
This weekend is my brother in law's wedding and the festivities include a bridesmaids day at the spa (Thursday), a "Red Carpet Glamour" welcome party and rehearsal dinner (Friday), and of course the wedding (Saturday)! I am wearing a bridesmaids dress on Saturday, but for the party on Friday, I will be wearing one of these two dresses (Herve Leger, Dolce & Gabbana) from Rent the Runway. I am so excited for them to arrive this week, and I am just praying that one of them will fit! So in preparation for squeezing into one of these dresses, I have been eating super healthy.
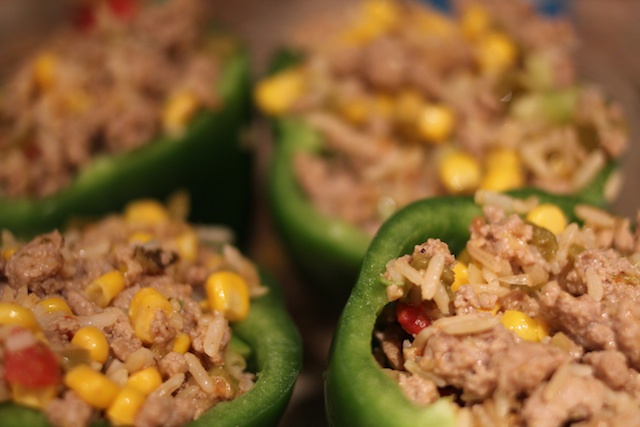
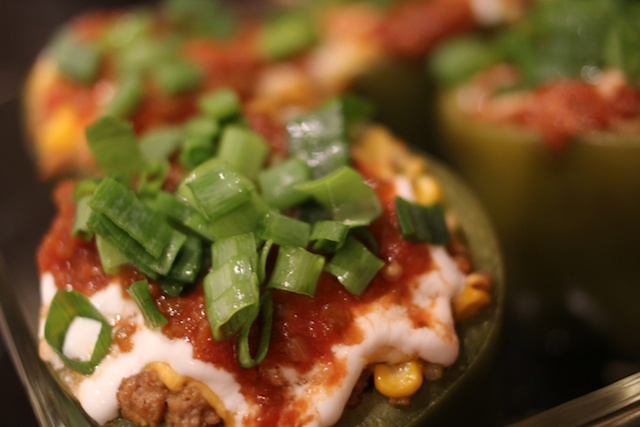
I found this recipe from Real Simple for Southwestern Stuffed Peppers. I knew that I had to try it but I made some simple substitutions to make it healthier. It was the perfect Saturday night dinner! Here is how I made it.
Ingredients
- 1 cup brown rice
- 1 tablespoon olive oil
- 6 scallions, thinly sliced, white and green parts separated
- 1/2 pound lean ground turkey
- 1 cup frozen corn
- 1 4.5-ounce can chopped green chilies
- 1 teaspoon ground cumin
- 4 ounces reduced fat Monterey Jack, grated (1 cup)
- kosher salt and black pepper
- 4 large bell peppers, tops, ribs and seeds removed
- 1/2 cup plain low-fat Greek yogurt
- Hot sauce (optional)
- Salsa, for serving
Directions
1. Heat oven to 375° F. Cook the rice according to the package directions.
2. Heat the oil in a large skillet over medium-high heat. Add the scallion whites and turkey and cook, breaking the beef up with a spoon, until no longer pink, 3 to 5 minutes. Stir in the corn, chilies, cumin, cooked rice, ½ cup of the Monterey Jack, ½ teaspoon salt, and ¼ teaspoon black pepper. I also added a few drops of hot sauce, but that is optional.
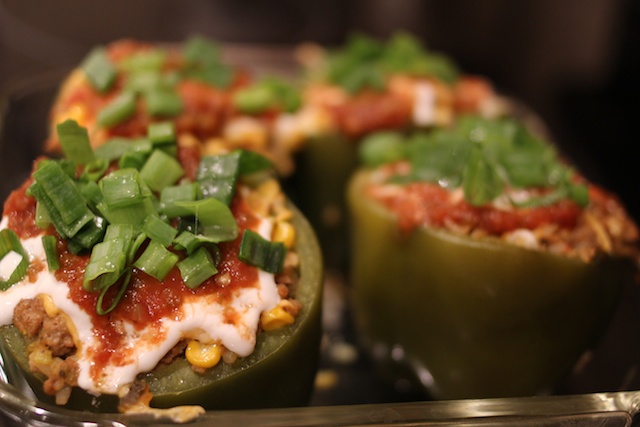
3. Arrange the bell peppers, cut-side up, in a small baking dish or pan. Divide the turkey mixture among the bell peppers, add ½ cup water to the dish, tightly cover the dish with foil, and bake until the bell peppers are soft, 30 to 40 minutes. Uncover, sprinkle with the remaining ½ cup of Monterey Jack, and bake until browned, 5 to 7 minutes more.
4. In a small bowl, whisk together the yogurt and ¼ cup water. Drizzle over the bell peppers and top with the salsa and scallion greens.
Adapted from Real Simple
Happy Valentine's Day!
14 February 2026
4:46 AM

Happy Valentine's Day loves! I'm sorry for being so MIA this past week, I have been working on a project that I'm excited to tell you about later this week!
I hope you all have a wonderful day whatever your plans are! Kris and I are having date night at a new restaurant in Ft Lauderdale...can't wait!
xoxo
Meggan
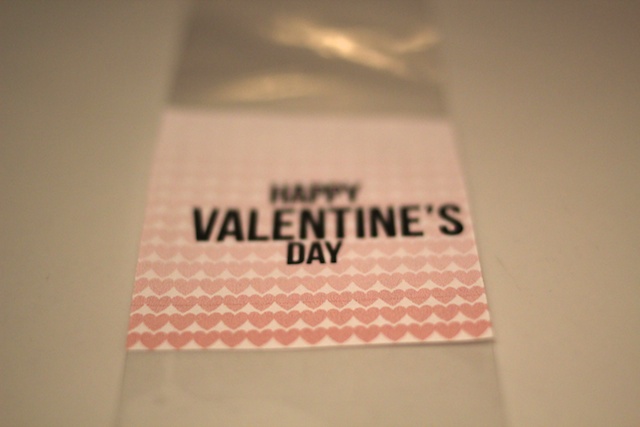
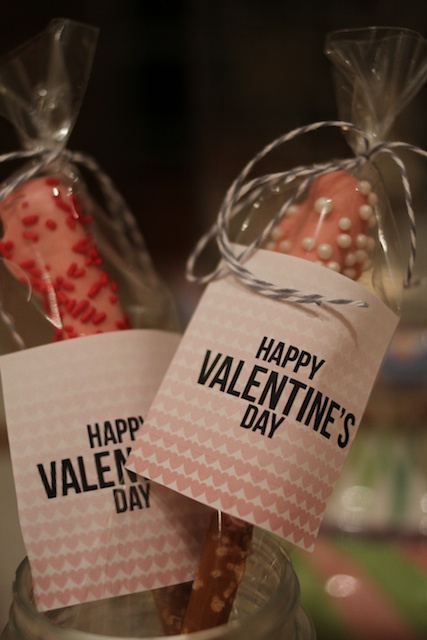
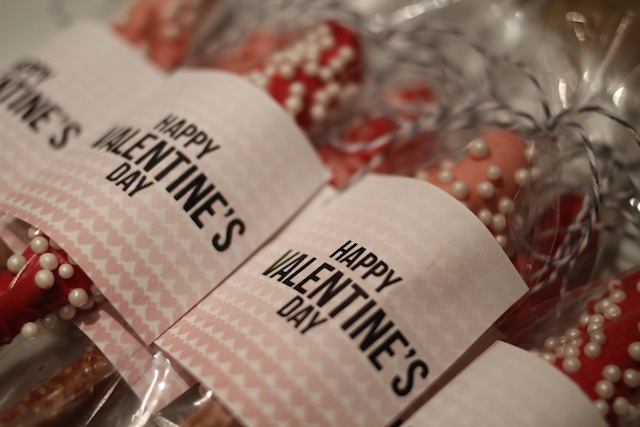
Valentine's Chocolate Covered Pretzels
10 February 2026
4:00 AM
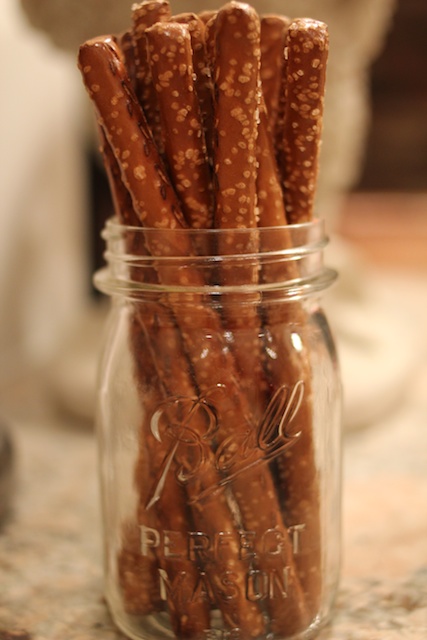
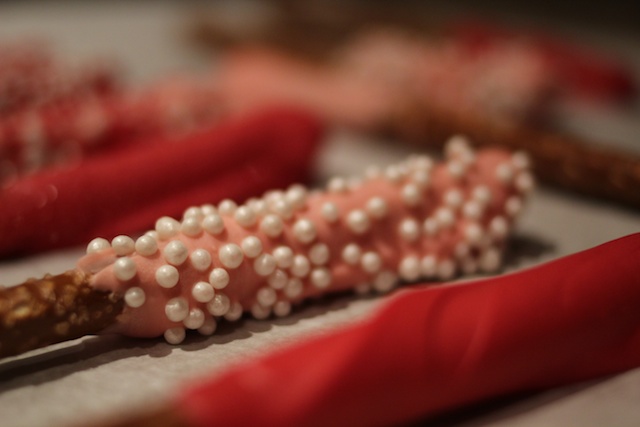
Happy Friday! A few weeks ago I blogged about the DIY Valentine's projects, that I wanted to tackle. Last night I crossed one of the items off of that list when I made chocolate covered pretzels. These Valentine's treats combine the best of sweet and salty, plus they are pretty and easy to make! I designed ombre heart labels to adorn each pretzel package.

I hope you all have a wonderful weekend!
xoxo Meggan
This week I am linking up with
Weekend Wrap Up Party at Tatertots and Jello
Strawberry Shortcake in a Jar
06 February 2026
4:11 AM
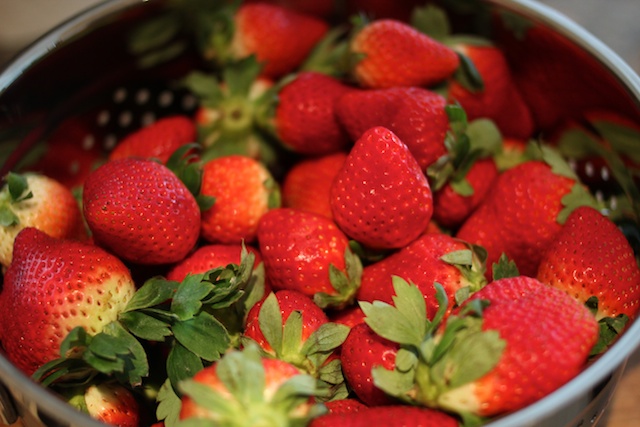
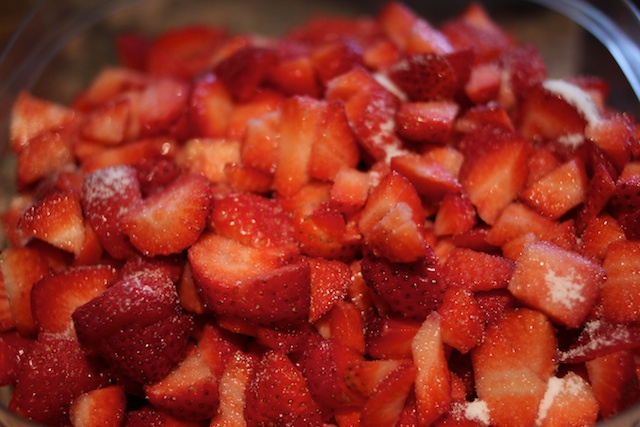
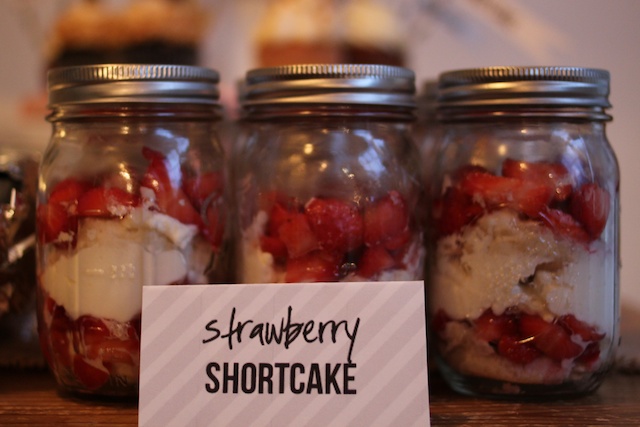
Happy Monday, sweet friends! I am absolutely exhausted after this weekend, but it was very productive and definitely fun! After a date night, running a 5k and major amounts of cleaning/cooking, we hosted our friends for a Superbowl party last night! One of my favorite dishes from the party had to be the strawberry shortcake in a mason jar. Strawberry shortcake is one of my absolute favorites, and desserts in a jar are so much fun! Here is this super easy recipe.
Ingredients (serves 12)
- 4 containers of fresh strawberries
- 2 tablespoons of white sugar
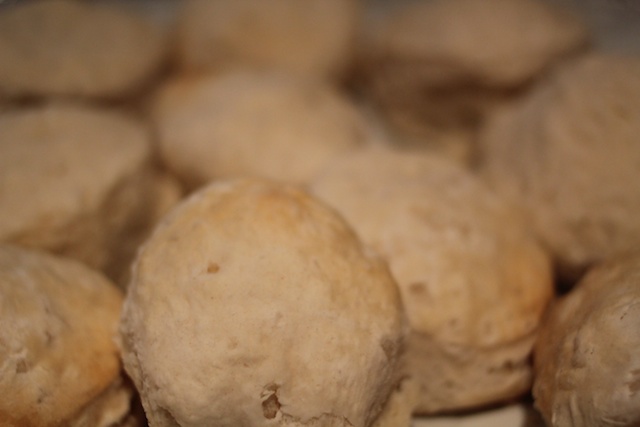
- 15-20 cooked biscuits (I bought a bag of frozen biscuits and cooked them according to the instructions on the bag
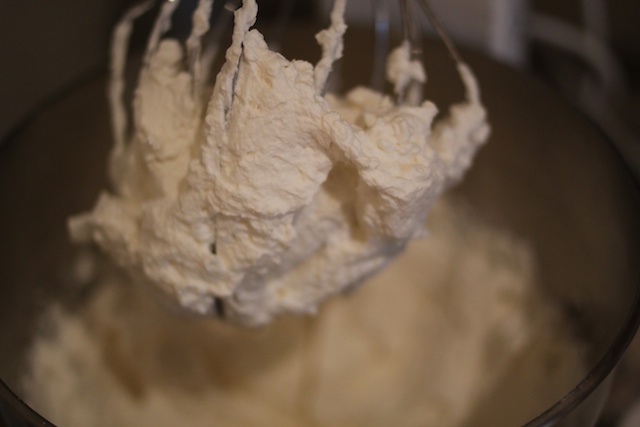
- 1 large container of heavy whipping cream
- 1 tsp of vanilla
- 1 tablespoon of confectionary sugar
- 12 mason jars
Instructions
1. Wash and cut all of the strawberries. Sprinkle white sugar all over the strawberries and mix gently. Set aside for 20 minutes to let the sugar create a glaze over the strawberries.
2. Cut the biscuits into thin slices (2-3 per whole biscuit).
3. Mix/beat the whipping cream, vanilla and confectionary sugar until peaks form and the cream is thick. I used my KitchenAid mixer on a high setting. Just be careful that you do not over beat the cream.

4. Begin to assemble the layers of biscuit, strawberries and whipped cream. I started with a biscuit, then strawberries and then whipped cream. I then added another biscuit, whipped cream and finally strawberries.
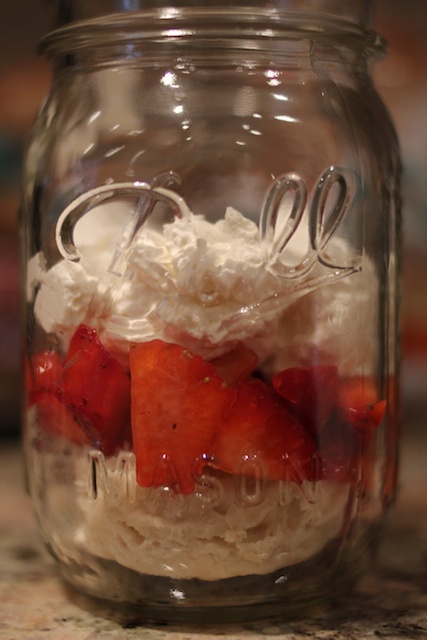
6. Add the top back to your mason jars and refrigerate until ready to use. I made mine about 2 hours before our event.
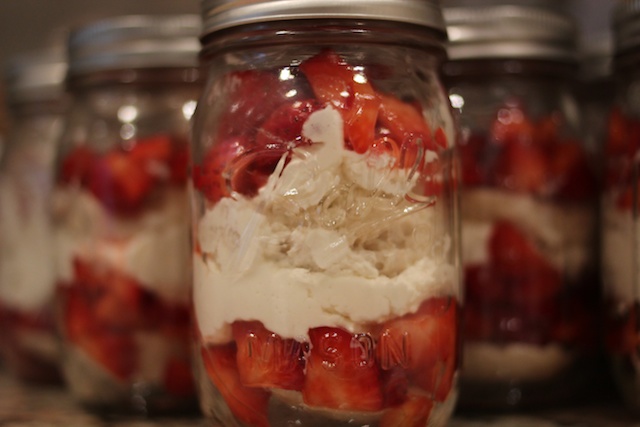
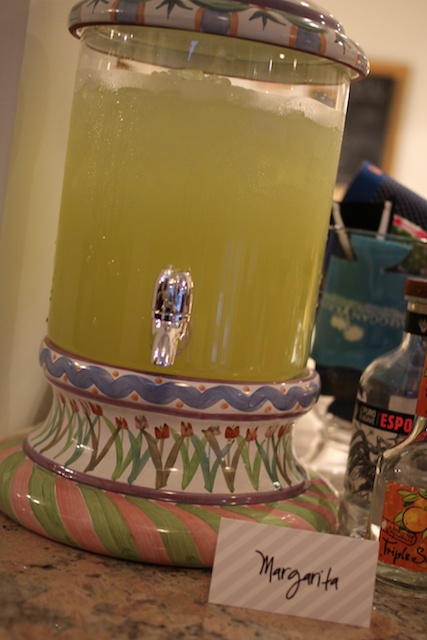
Here are some more pictures of these strawberry desserts, and the rest of our Superbowl party!
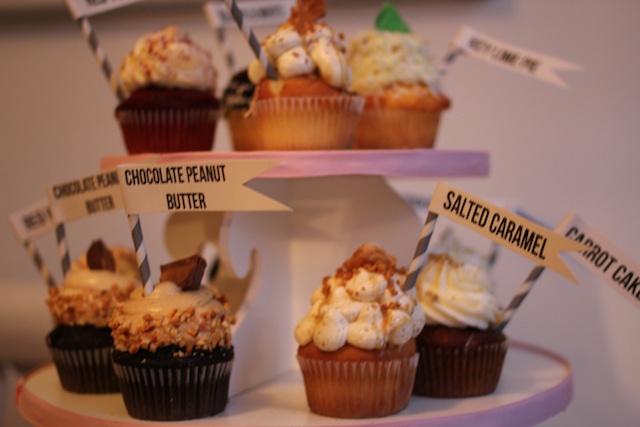
we bought these from the sweeter days bake shop
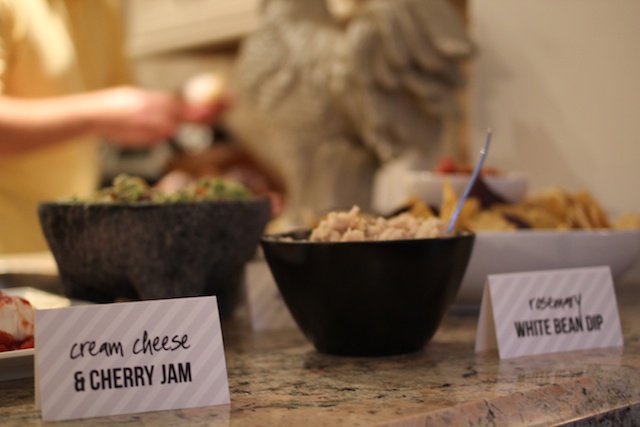
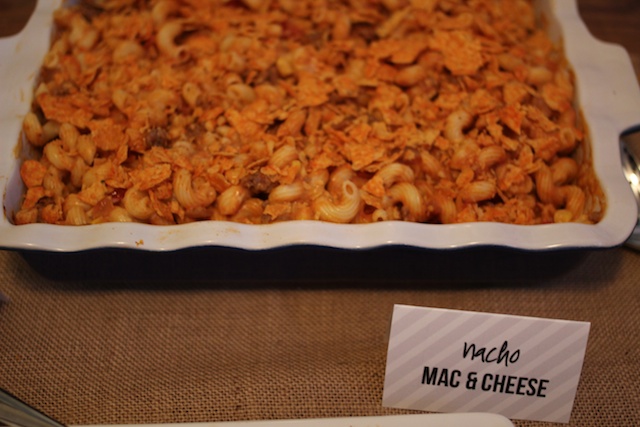
I got this nacho mac & cheese recipe from the amazing Val So Cal!
This week I am linking up with
Wow Us Wednesday at Savvy Southern Style
I hope you all have a wonderful week! xoxo
Friday's Fancies - Spring Fever!
03 February 2026
3:24 AM
When you live in South Florida, spring fever in the winter is easily caught. Truth be told, this time of year is the best time of year to live in Florida...those snow birds know what they are doing! For this reason I was so excited when {av} announced that the theme of this week's Friday Fancies was Spring Fever! Here is my ideal spring outfit complete with bright colors and florals.

I love navy combined with bright colors and floral patterns for spring; it feels so fresh and the perfect way to transition out of winter! Be sure to check out the other spring looks on Long Distance Loving!
Kris and I have a busy weekend ahead...date night on Friday, running our first 5k together on Saturday to benefit Taylor's Closet, and then we are hosting our Super Bowl party on Sunday! I hope you all have a fabulous weekend!
xoxo Meggan
Kris and I have a busy weekend ahead...date night on Friday, running our first 5k together on Saturday to benefit Taylor's Closet, and then we are hosting our Super Bowl party on Sunday! I hope you all have a fabulous weekend!
xoxo Meggan
DIY Chalkboard and Heart Garland for $3!
02 February 2026
4:20 AM
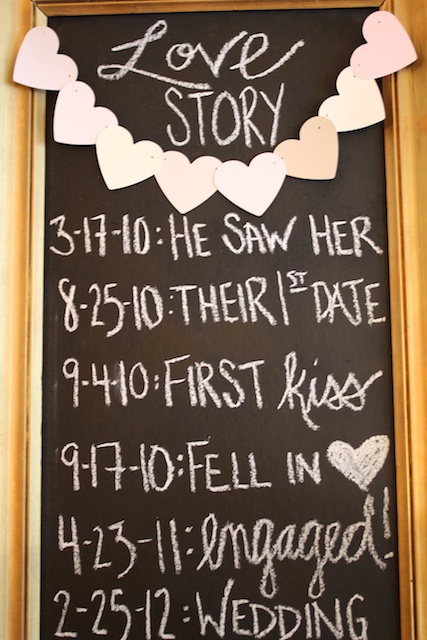
Thank you all SO much for your sweet comments on the bridal shower post! You all made my heart so full when reading them!! One of my favorite projects from the shower this past weekend was a chalkboard that listed important dates in the bride and groom's love story. We placed it right next to the guest book so everyone could see it upon their arrival. I made this board for only $3! I had most of the supplies already so if you need to buy some things like paint it may be a bit more expensive. Here is the tutorial!
Materials
- picture frame with a canvas painting or glass
- chalkboard paint
- chalk
- paint samples
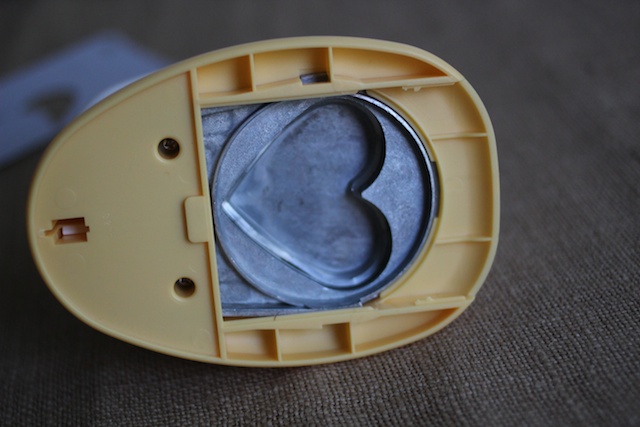
- heart punch
- mini hole punch (1/8 inch) optional
- white thread and needle
- scotch tape
Tutorial
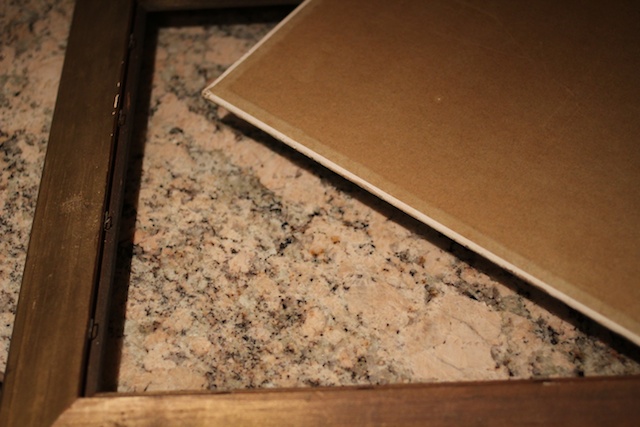
Step 1: Find a picture that is the shape and size of the board you want to create. I found a great framed canvas painting with out glass in the front for $3 at Goodwill! I am sure you could also just use a framed picture with glass instead of the canvas.
Step 2: Remove the canvas and paint the smooth side with chalkboard paint. I used 2 layers to create the chalkboard effect.
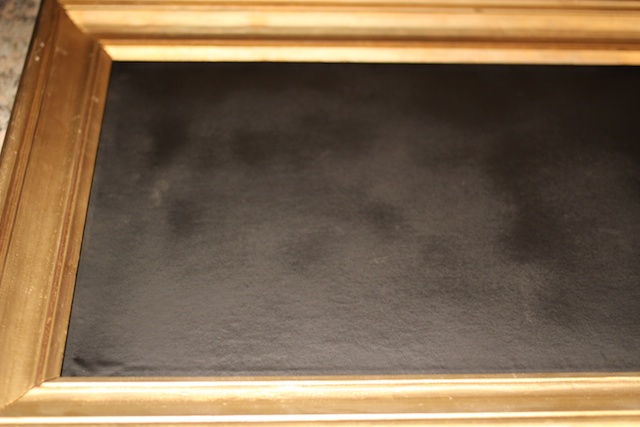
Step 3: Once dry add back to the frame.
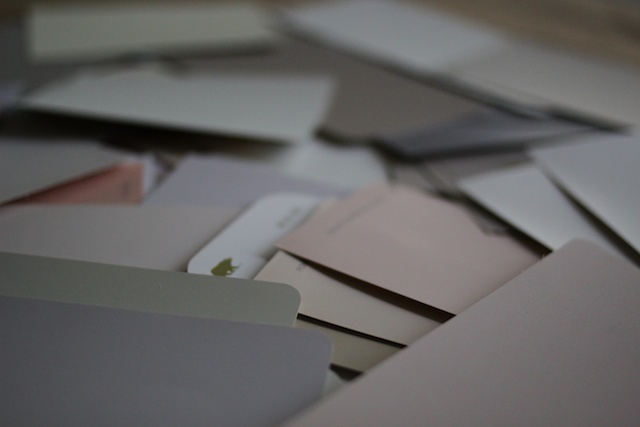
Step 4: To make the heart garland, take paint samples {I had a ton of these left over from our renovation that you can read about here} and punch out about 8 hearts.
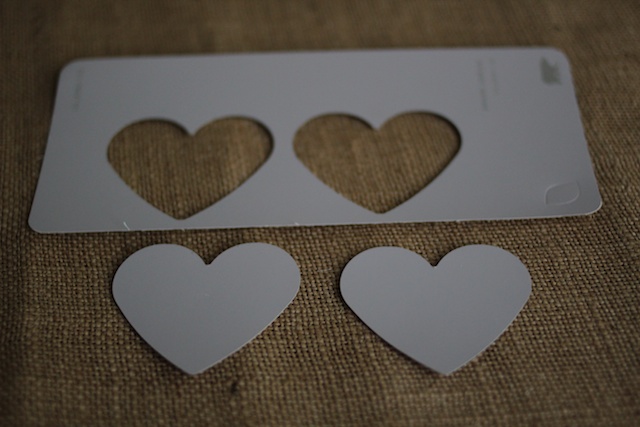
Step 5: String together the hearts using thread and a needle. I used the 1/8 punch to make a hole in each side of the top of the heart, to make it easier to string the hearts. Once you have the desired length, tape the heart garland to the back of the frame, and use a bit of tape to secure middle heart to the chalkboard
I'm sorry! I forgot to take pictures of this stage :(
Step 6: Write out the important dates with chalk. My friend Katie has beautiful handwriting and so she wrote all of the dates for us.
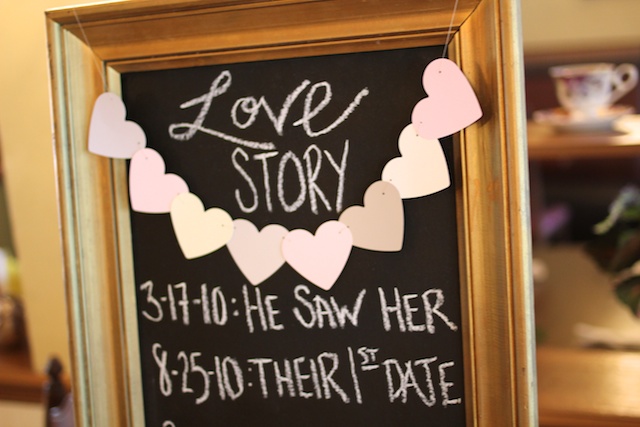
And voila, you have your chalkboard. I am planning on reusing this board to list our weekly menu in our kitchen, so it will have 2 uses! I hope you have a great Thursday! xoxo Meggan