New Year, New House
31 December 2010
1:38 PM
I can't believe today is New Years Eve! It feels like this year has flown by, but so much has happened as well. One of the biggest things that happened to Kris and I this year was that we bought our first home together. We bought our house in April and have been renovating ever since! It has been amazing to see it come together from a foreclosed 70's style mess to my dream house! Kris and I are so blessed to have our families support and input during this whole process; it is the only way the whole project came to fruition. We are officially moving in next week and we can't wait!
This is a very picture heavy and long post, but I wanted to share our home's transformation with some before and after pictures. I hope you enjoy!
Front of our house before:
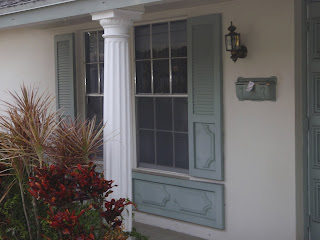
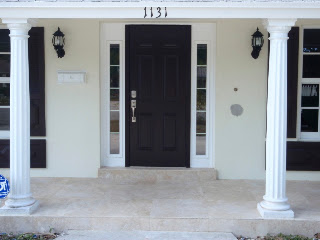
Front of our house after. We used all Sherwin Williams colors in white, muslin and espresso to give it a traditional/New England feel. I can't wait to work on the landscaping in the front yard.
Entry Way/Dining Room Before:
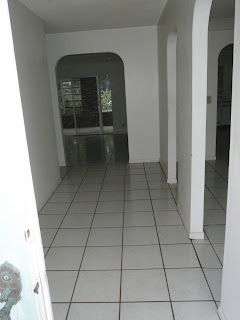
Entry Way/Dining Room After. We took out the arches that closed off the dining room; it makes the room look so much bigger! The dining room is painted in Rattan from Benjamin Moore's colors for Pottery Barn.


The Kitchen Before.


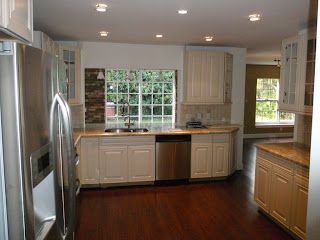
The Kitchen After. This is one of my favorite rooms in the house :) Our granite has a mix of white, brown and champagne colors and the back splash is a tumbled white onyx. We are still missing a few things like a microwave and the crown molding along the top but it is almost there!


The Family Room Before.

The Family Room After. This room is also painted in the Pottery Barn Rattan color. The rest of the house is mostly painted in Pottery Barn's Decorator White so we can change the paint colors as we go. Choosing paint colors is so tough for me!

The Florida Room Before.

The Florida Room After. Originally this room was one of my least favorite rooms and now it is my favorite! This room is where I think the wood floors make a big difference over the white tile. I love how it warms up this space. I call this space the room that will take off because it literally sounds like a plane is taking off when you turn on all the ceiling fans at once! We didn't know what lighting to use in this room so we are planning on replacing some of it soon.


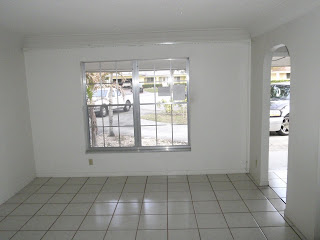
The Living Room Before.

The Living Room After. We removed the arched wall to open up this room and added new fixtures and flooring.

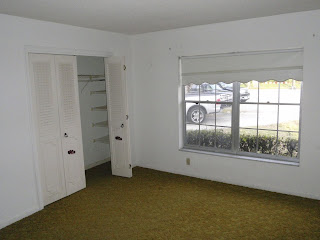
Two Guest Bedrooms Before (don't you love the orange and green carpet?!)

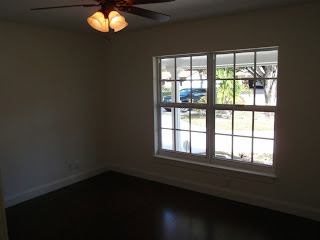
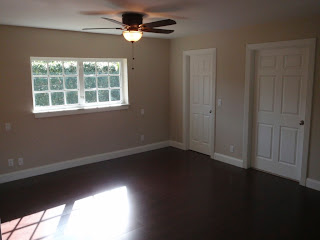
Two Guest Bedrooms After.

Guest Bathroom Before. This room was quite possibly in the worst shape of any room in the house. You can see the wall in the shower was actually falling in!

Guest Bathroom After. This room was completely gutted because of the terrible shape it was in. I was inspired by a design that I saw in Pottery Barn (surprise, surprise!) for this bath. We used a subway tile and gray marble accent trim on the walls. The vanity is a white wood with a similar gray and white marble top. We still need to find the right mirrors for this room!

 The Craft Room Before.
 The Craft Room After...or should I say Lila Grace HQ! I am so excited to have my own dedicated space for sewing and crafting! I kept this space very clean and simple so it can be dressed up with lots of fun accessories. I found this chandelier at Ikea for like $30. Amazing deal!

Master bedroom before.

Master Bedroom After. The pocket french doors lead into the craft room! I used a color called Manchester Tan for this room, again by Benjamin Moore for Pottery Barn.

The Master Bath before.


The Master Bath After. We found an amazing deal on honey onyx and marble from a local tile dealer and used it through out the bathroom.


Can't wait to share pictures as I start to decorate during 2011! Happy New Year everyone!
xoxo
Meggan
This is a very picture heavy and long post, but I wanted to share our home's transformation with some before and after pictures. I hope you enjoy!
Front of our house before:

Front of our house after. We used all Sherwin Williams colors in white, muslin and espresso to give it a traditional/New England feel. I can't wait to work on the landscaping in the front yard.

Entry Way/Dining Room Before:


Entry Way/Dining Room After. We took out the arches that closed off the dining room; it makes the room look so much bigger! The dining room is painted in Rattan from Benjamin Moore's colors for Pottery Barn.


The Kitchen Before.


The Kitchen After. This is one of my favorite rooms in the house :) Our granite has a mix of white, brown and champagne colors and the back splash is a tumbled white onyx. We are still missing a few things like a microwave and the crown molding along the top but it is almost there!


The Family Room Before.

The Family Room After. This room is also painted in the Pottery Barn Rattan color. The rest of the house is mostly painted in Pottery Barn's Decorator White so we can change the paint colors as we go. Choosing paint colors is so tough for me!

The Florida Room Before.

The Florida Room After. Originally this room was one of my least favorite rooms and now it is my favorite! This room is where I think the wood floors make a big difference over the white tile. I love how it warms up this space. I call this space the room that will take off because it literally sounds like a plane is taking off when you turn on all the ceiling fans at once! We didn't know what lighting to use in this room so we are planning on replacing some of it soon.


The Living Room Before.

The Living Room After. We removed the arched wall to open up this room and added new fixtures and flooring.

Two Guest Bedrooms Before (don't you love the orange and green carpet?!)


Two Guest Bedrooms After.


Guest Bathroom Before. This room was quite possibly in the worst shape of any room in the house. You can see the wall in the shower was actually falling in!

Guest Bathroom After. This room was completely gutted because of the terrible shape it was in. I was inspired by a design that I saw in Pottery Barn (surprise, surprise!) for this bath. We used a subway tile and gray marble accent trim on the walls. The vanity is a white wood with a similar gray and white marble top. We still need to find the right mirrors for this room!

 The Craft Room Before.
 The Craft Room After...or should I say Lila Grace HQ! I am so excited to have my own dedicated space for sewing and crafting! I kept this space very clean and simple so it can be dressed up with lots of fun accessories. I found this chandelier at Ikea for like $30. Amazing deal!
Master bedroom before.

Master Bedroom After. The pocket french doors lead into the craft room! I used a color called Manchester Tan for this room, again by Benjamin Moore for Pottery Barn.


The Master Bath before.


The Master Bath After. We found an amazing deal on honey onyx and marble from a local tile dealer and used it through out the bathroom.


Can't wait to share pictures as I start to decorate during 2011! Happy New Year everyone!
xoxo
Meggan
Winter Recipe
19 December 2010
6:11 PM
Before getting married two years ago I was not much of a cook. I was working and traveling so much that I lived off of take out, room service and pasta. I did try to make a carrot cake once and the recipe called for oil. Well I did not think there would be any problem with using olive oil instead of vegetable oil. Let's just say my cake was totally sunken in the middle and it tasted more like the olive oil than anything else!
When I moved to Florida I finally had someone else to cook for/with and because I had significantly more free time, I decided to learn how to cook. To start on this journey I started watching the Food Network and tried several of Giada de Laurentiis' recipes. We had a few nights where Kris and I ordered pizza instead of eating my "creation" but I got better every day. Giada truly taught me how to cook! Her book Every Day Italian is such a staple for me.
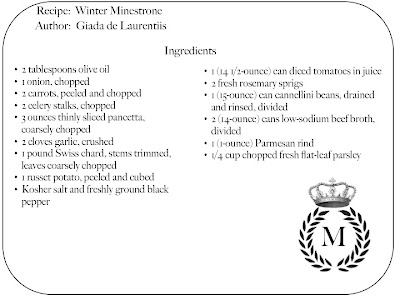
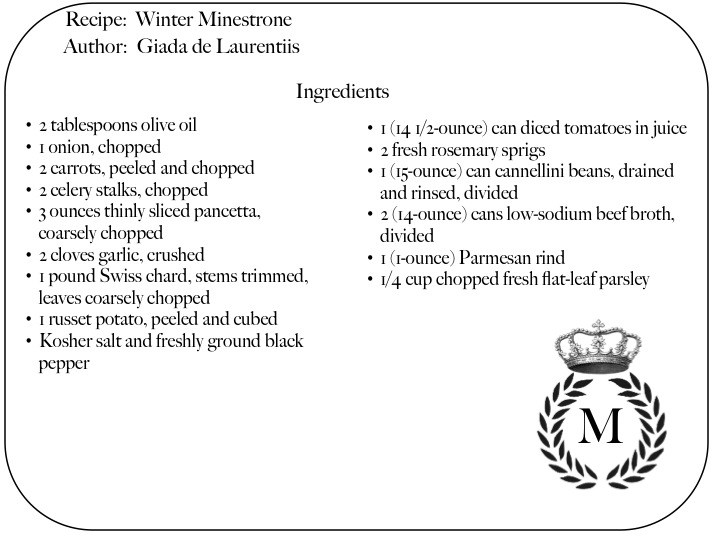
On Giada's cooking show this past Saturday morning she made an incredible winter minestrone soup. It looks amazing and I can't wait to make it on our next "cold Florida night" :)!
The recipe is below and here. Enjoy and happy cooking! xo

When I moved to Florida I finally had someone else to cook for/with and because I had significantly more free time, I decided to learn how to cook. To start on this journey I started watching the Food Network and tried several of Giada de Laurentiis' recipes. We had a few nights where Kris and I ordered pizza instead of eating my "creation" but I got better every day. Giada truly taught me how to cook! Her book Every Day Italian is such a staple for me.
On Giada's cooking show this past Saturday morning she made an incredible winter minestrone soup. It looks amazing and I can't wait to make it on our next "cold Florida night" :)!
The recipe is below and here. Enjoy and happy cooking! xo

Christmas Project - Wine Tags
18 December 2010
5:07 AM
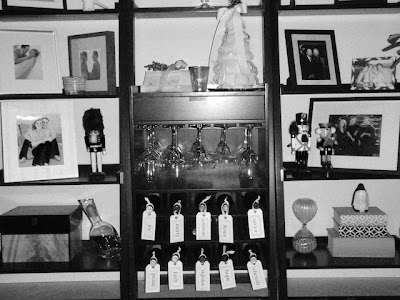
This week I decided to work on another Christmas project for our house. I can't help myself with Christmas decorating...I am like an addict! In our living room we have a large wall unit that has some wine storage in the middle. So after my recent trip to wine country I decided to create Christmas wine tags for the bottles in this wine rack. Here is how I made them:
 Supplies
One package of Maco manila tags from Office Depot (about $5)
Cream colored card stock (2 sheets)
1/4 yard of cream colored burlap
Ribbon
Hot glue gun
1. Remove the strings from your Maco tags.
2. Select the holiday words you want to use for your tags and type them out in PowerPoint. Using a font called Big Caslon I was able to fit eight words on each sheet. I made 16 tags so I used 16 words. A sample of this is below.
3. Print words onto cream card stock and cut out each word in a rectangular shape.
4. Cut your burlap in rectangles so that the burlap will almost cover the rectangular part of the tag.
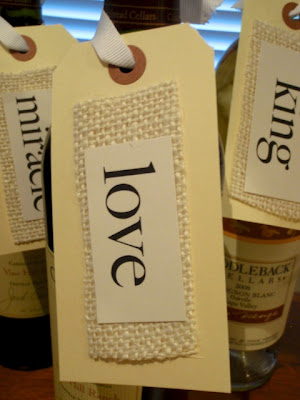
5. Hot glue one rectangle of burlap to the tag. Then using just a bit of hot glue, glue your selected word to the tag. Follow this process for each tag.
6. Decide how far you would like each tag to hang and cut your ribbon to this length.
7. Tie each ribbon around your wine bottles and you are all set!
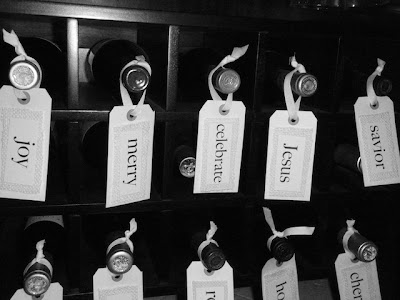
Below are some pictures of how my tags turned out. Happy Decorating!! xoxo


 Supplies
One package of Maco manila tags from Office Depot (about $5)
Cream colored card stock (2 sheets)
1/4 yard of cream colored burlap
Ribbon
Hot glue gun
1. Remove the strings from your Maco tags.
2. Select the holiday words you want to use for your tags and type them out in PowerPoint. Using a font called Big Caslon I was able to fit eight words on each sheet. I made 16 tags so I used 16 words. A sample of this is below.
3. Print words onto cream card stock and cut out each word in a rectangular shape.
4. Cut your burlap in rectangles so that the burlap will almost cover the rectangular part of the tag.
5. Hot glue one rectangle of burlap to the tag. Then using just a bit of hot glue, glue your selected word to the tag. Follow this process for each tag.
6. Decide how far you would like each tag to hang and cut your ribbon to this length.
7. Tie each ribbon around your wine bottles and you are all set!
Below are some pictures of how my tags turned out. Happy Decorating!! xoxo


I Love Napa :)
13 December 2010
12:54 PM

Last weekend I went to Napa for my sister in law Michael's bachelorette party. We had the most fabulous time! California's wine country is one of the most beautiful places I have ever seen. Wine, beautiful rolling hills, winter weather, amazing food...what could be better?!
 I was in charge of selecting our wineries and dinners for the trip. With any vacation I am a die hard planner; I love researching every detail almost to the point where I am stalking TripAdvisor.com! After narrowing it down I tried to select some boutique wineries as well as a few more well known vineyards. For anyone who wants to plan a weekend to Napa, here is our itinerary and my recommendations for a weekend trip:
 Friday
 Sterling Vineyards
Cakebread Cellars
Beringer Vineyards
Dinner: Morimoto
 Saturday
Saddleback Vineyards
Chimney Rock
Reynolds Family Vineyards
Dinner: Cole's Chop House


